

06 Sep Changing Your Drysuit Seal In A Few Minutes


Your drysuit seal is broken again?
It happens that your seals break without a shop next to you or not having time to go there.
Here I want to show you the miracle of changing the seals of a drysuit. Basically it´s not more than removing the old one and to add a new one 😉
Changing drysuit seals, step by step instructions
- first, remove the broken seal carefully. You can also use a hair dryer to warm up the glued areas.
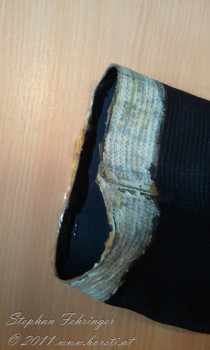
- with a piece of sandpaper you can remove the rest of the old glue
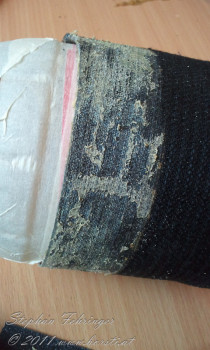
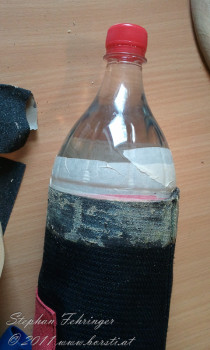
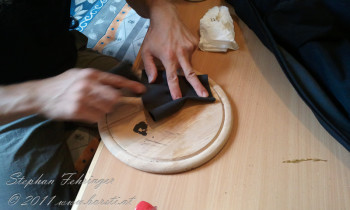
- Use a bottle or milled wood to hold the suit in place. Then clean the glue area. You can use something similar like silicon cleaner
- Roughen the glue area of the new seals and clean it also
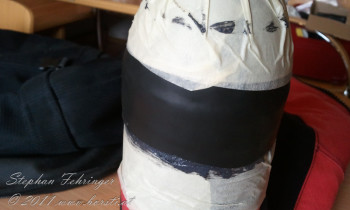
- Bring the new seal in it´s final place. I covered the areas around to avoid having glue on it
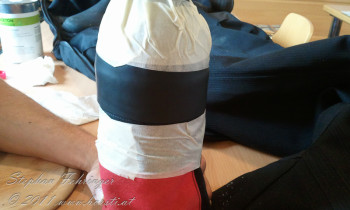
- Turn the new seal backward, like here on this picture
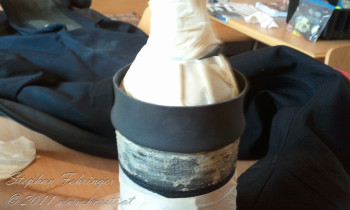
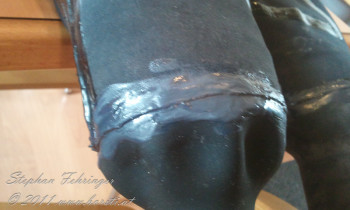
- I use a 2 component glue (SC4000) with less hardener. You can also use every other cantact glue available at the hardware store next to you
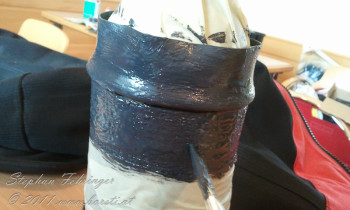
- Leaf it to dry for a few minutes till the glue is dry. Read the manual of your glue first!
- Roll the new drysuit seal back in its final position. Be careful, You have only one chance!
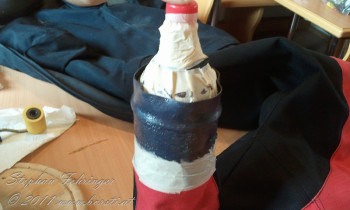
- Your DIY project is almost finish. If you want you can seal the inner side with some glue.


Depending on your glue you have to wait till it´s set hard.
I wish you good luck and always a dry suit!


No Comments